Home EV charger installation has become a must-have for more drivers each year. Battery Electric Vehicles will make up more than 13% of new vehicle sales in 2024. Most EV owners (83%) charge their vehicles at home, which makes a personal charging station more than just a convenience.
The big question is – should you DIY this project? Installing an EV charger involves high-voltage electrical work that impacts your daily life and safety. Level 1 and Level 2 chargers differ greatly in performance. A Level 1 charger adds about 5 miles of range per hour. Level 2 chargers are a big deal as it means that they provide roughly 25 miles of range during the same time.
Money matters too. A simple home EV charger costs $299, but premium models can go beyond $2,000. Installation costs usually run between $600 and $2,000. On top of that, you’ll need an electrical permit from your city to install a new EV charging circuit. This makes the whole process more involved than plugging in a regular appliance.
This piece walks you through everything in EV charging – from electrical requirements to professional installation costs. You’ll learn exactly when to call an electrician and what each option will cost, so you can pick the best solution for your home and car.
Understanding EV Charger Types
You should learn about different EV charger types before buying any equipment for your home. Each type comes with its own charging speeds, setup needs, and price tags.
Level 1: Basic charging with a standard outlet
Your electric vehicle includes a standard Level 1 charger that connects to regular 120-volt home outlets. This simple setup needs no installation and works with the J1772 connector that comes with your vehicle.
A Level 1 charger adds about 3-5 miles of range every hour. An overnight charge of 8 hours gives you roughly 36-40 miles of extra range.
Level 1 charging makes sense if you:
- Drive a plug-in hybrid with a smaller battery
- Have short daily commutes (under 40 miles)
- Don’t need to fully charge your car daily
The biggest drawback shows up in cold weather. These chargers might struggle to add power or keep the battery charged.
Level 2: Faster charging with 240V connection
Level 2 chargers use 240-volt circuits – the same ones that power your electric dryer or oven. They pack substantially more power and add about 25 miles of range per hour. An eight-hour overnight charge can give you up to 180 miles of range.
You can set it up by:
- Using an existing 240-volt outlet
- Getting a licensed electrician to install a new 240-volt circuit
The charging unit costs between $300-$800, plus any installation fees for new wiring. The upfront cost pays off quickly since you get your own “gas pump” at home.
Why Level 3 isn’t for home use
Level 3 chargers (DC Fast Chargers) add 3-20 miles of range per minute and can charge your car to 80% in 20-40 minutes. In spite of that, they don’t work for homes for several reasons.
These chargers need industrial-grade power systems – up to 480-1000 volts. A typical US home uses just 30 kWh daily, which makes Level 3’s power needs (up to 350 kW) impossible to meet.
The installation cost runs between $50,000 to $100,000. Even if money wasn’t an issue, most home electrical systems can’t handle such massive power demands.
Level 3 chargers work best in commercial areas and along highways where quick charging matters most.
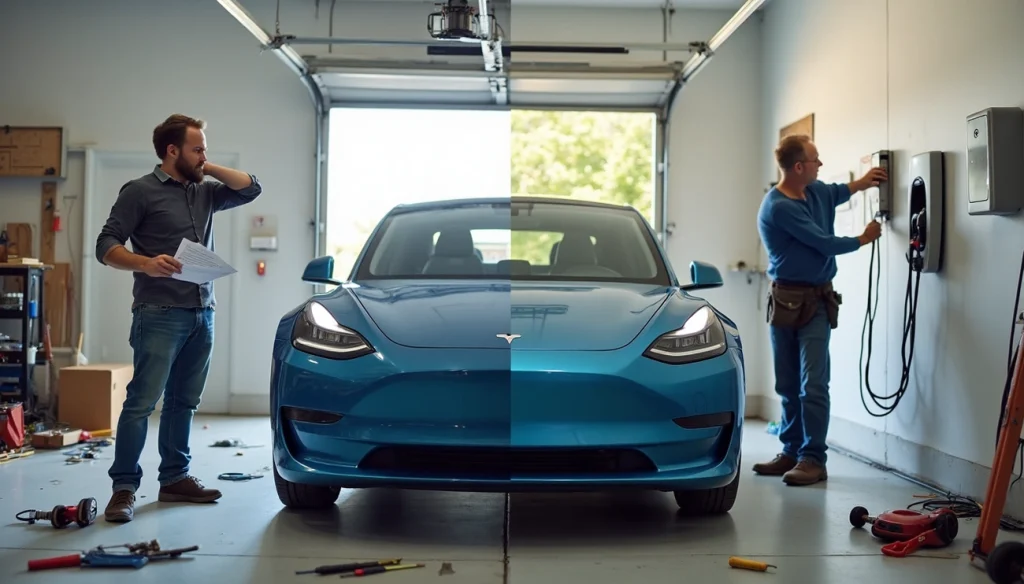
Can You Install an EV Charger Yourself?
You might feel tempted to install your home EV charger yourself to save money. But this decision needs more thought than just looking at your budget.
What DIY installation actually involves
A DIY EV charger installation isn’t just about mounting a device on your garage wall. Level 1 chargers usually work fine with a simple plug-in solution. Level 2 chargers need complex electrical work that includes:
- Checking your electrical panel’s capacity
- Installing dedicated 240-volt wiring
- Learning proper grounding techniques
- Setting up and connecting the charging unit
- Meeting local permit requirements
Professional electricians take 2-3 hours to install a Level 2 charger. A DIY project will likely need much more time.
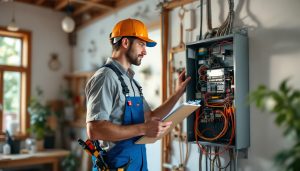
When a licensed electrician is required
You can install a Level 1 charger yourself, but Level 2 installations need a licensed electrician. Building departments ask for permits, and many areas require professional installation by law.
Level 2 chargers use 40-60 amps. This heavy power load often means you’ll need panel upgrades or new dedicated circuits.
Risks of improper installation
Bad installations can lead to serious problems:
- Incorrect wiring or circuit sizing can cause fires
- Poor grounding creates shock hazards
- Your vehicle’s battery system could get damaged
- Both charger and EV warranties become void
- Your homeowner’s insurance might not cover damages
Common mistakes homeowners make
DIY installers often make these crucial errors:
- Using wrong circuit sizes (48-amp chargers need 60-amp circuits)
- Not getting proper permits and inspections
- Installing regular outlets instead of industrial-grade ones
- Choosing incorrect wire sizes for the installation distance
- Wrong mounting that puts stress on cables
A recent inspection in Toronto revealed dangerous DIY setups with cables hanging from windows and wires stretched across sidewalks.
What It Takes to Install a Level 2 Charger
A Level 2 EV charger installation needs careful planning and proper execution. This project is nowhere near as simple as plugging in a new appliance and has most important electrical work to be done that needs attention to detail.
Electrical requirements for EV charging
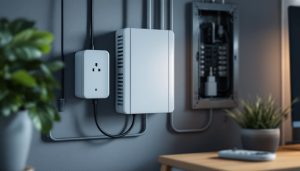
Level 2 chargers work on 240-volt circuits—like in what your electric dryer uses. These units just need 30-50 amps of dedicated power. Most home installations use a 40-amp circuit for a 32-amp charger.
The National Electrical Code states that circuits must be sized for continuous duty at 125% of the maximum load. Your 32-amp charger needs a 40-amp circuit breaker. On top of that, GFCI protection must be installed for all receptacles with capacities of 50 amps or less.
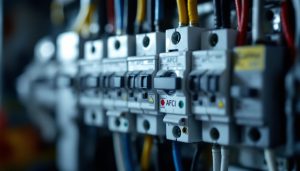
Wiring and panel upgrades
Most new homes with 200-amp electrical panels can handle an EV charger without upgrades. Older homes with 100-amp panels usually need upgrading before installation.
You can consider these alternatives to a full panel upgrade:
- Load Management Units that cut power to connected devices if energy usage reaches 80% capacity
- Transfer switches that allow two high-demand appliances to alternate power usage
Permits and inspections
Local regulations usually require you to get electrical permits before installation. Each municipality’s permit process varies but usually needs electrical schematics and site plans.
An inspection must verify compliance with local electrical codes after installation. You might face fines, delayed charger use, or insurance complications if you skip this step.
Trenching and outlet placement
Your charger location might need trenching if it’s far from the electrical panel. These trenches should be at least 18 inches deep from your foundation to the post.
The charger’s location matters—it should be close to your parking spot while staying available to your electrical system. Note that EVSE codes restrict charging cord length to 25 feet unless you have a cable management system.
Time and labor involved
An experienced electrician takes 2-6 hours to complete a typical Level 2 installation. Complex installations with panel upgrades or extensive trenching might take 1-2 days. The whole process has four main steps: permissions/permitting, trenching/exterior work, interior electrical work, and inspections.
Cost Breakdown: DIY vs Hiring a Pro
The choice between DIY and professional installation involves more than just money savings. Let’s get into what you’ll actually pay with each option.
Charger unit cost
A standard Level 2 EV charger costs between USD 300-1200. Smart chargers with continuous connection features will add USD 100-300 to your bill. Your vehicle comes with Level 1 chargers, but Level 2 chargers need separate purchase. Simple models range from USD 350-800.
Labor and electrician fees
Licensed electricians charge USD 250-400 for simple setups that use existing 240-volt circuits. Complex installations with new circuits and extensive electrical work run between USD 799-1999. The total electrician fees range from USD 400-1500 based on how complex the job is.
Permit and inspection costs
You can’t skip permits – they’re mandatory in most places. Residential permits cost USD 100-500, and inspection fees add USD 50-200. Some local authorities charge substantially less – around USD 98.
Unexpected expenses from DIY errors
DIY costs often show up much later. Bad wiring can harm your vehicle’s charging system and create fire risks. When inspections fail, you’ll need professionals to fix the mistakes. Your charger’s warranty and vehicle warranty might become void due to improper installations. This could mean thousands in repair costs down the road.
Conclusion
A home EV charger is a smart investment that makes your vehicle more practical and convenient. Level 1 chargers plug right into existing outlets, but Level 2 chargers charge five times faster and will improve your EV ownership experience by a lot.
DIY installation might look like an economical solution at first. The electrical complexities and safety risks make professional installation the smart choice for most homeowners. Licensed electricians make sure your system meets code requirements, runs safely, and keeps both your charger’s and vehicle’s warranties valid.
Think over the complete financial picture before you decide. Quality Level 2 chargers cost $300-1200, plus $400-1500 for professional installation – that definitely adds up. The upfront cost pays off through daily convenience and helps avoid thousands in repair costs from DIY mistakes.
Note that electrical permits protect you and future homeowners – they’re not optional. Skipping permits might save money now but can cause problems during home inspections or insurance claims down the road.
Your charging setup will serve you for many years. Putting safety and proper installation ahead of quick savings makes sense. The peace of mind you get from a professionally installed charging system proves its worth every time you plug in your EV at night.