Your house amperage can range from 30 amps in very old homes to 400 amps in large, modern residences.
Most homes today have electrical services between 100 to 200 amps. The current standard for new constructions sits at 200-amp service.[-5] Your home’s electrical needs have likely grown beyond what homeowners predicted years ago as you add more appliances, technology devices, and luxury additions like spas or pools.
A home smaller than 3,000 square feet without central air conditioning or electric heating can function well with 100-amp service. Homes larger than 2,000 square feet with central air or electric heat need at least 200-amp service.
Your house’s amperage knowledge goes beyond preventing inconvenient power outages—it serves as a crucial safety measure for any homeowner. This piece will teach you how to check your house amperage, understand the standard house amperage for your specific living situation, and determine the right time to call a professional for an upgrade.
Understand Your Home’s Electrical Service
Understand Your Home’s Electrical Service
Your home’s electrical service powers everything in your household. The electrical system works just like your body’s circulatory system and delivers all the electricity you need daily.
What is amperage and why it matters
Amperage (measured in amps) shows how much electrical current flows through your home’s wiring. Picture water flowing through pipes – bigger pipes let more water flow through. The same principle applies to your electrical system – higher amperage lets you run more devices at the same time.
Amperage matters for two key reasons. Your safety comes first – an overloaded electrical system creates fire risks and can harm your appliances. The system’s functionality matters too – low amperage causes breakers to trip, lights to dim, and stops you from running multiple appliances.
Standard house amperage explained
Most modern homes use 200-amp service, which became the standard for new construction after 2000. Houses built before 1960 often run on 60-amp service, while homes from the 1960s through 1990s usually have 100-amp service.
Residential electrical service comes in these categories:
- 60-amp service: Houses built before 1960 have this, but it won’t handle modern needs
- 100-amp service: You’ll find this in homes built between 1960-1990
- 150-amp service: Works well for medium-sized homes with standard appliances
- 200-amp service: New construction uses this standard now
- 400-amp service: Large homes with heavy electrical use need this
How many amps should a house have?
Your home’s right amperage depends on its size and electrical needs. Homes under 2,000 square feet with gas heating can work with 100-amp service. Still, 200-amp service gives you more options for the future.
Your house will need at least 200-amp service if it’s larger or uses all-electric appliances, central air, hot tubs, or has a workshop. You might also need more power if you plan to renovate, add space, or install new major appliances.
Square footage matters, but you should think about these factors too:
- Number and type of appliances (especially high-draw items like electric ranges)
- Electric vehicle charging needs
- Home office equipment
- Entertainment systems
- Future expansion plans
Locate and Identify the Main Electrical Panel
Locate and Identify the Main Electrical Panel
You need to find your electrical panel to check your house amperage. The panel’s location might seem mysterious, but it’s actually quite straightforward to find.
Where to find your house electrical panel
Your home’s electrical panel sits in utility spaces away from main living areas. Here are the most common spots:
- Basement or cellar – mounted on a wall
- Garage – usually on a side wall near the entry
- Utility or laundry room
- Exterior walls – especially when you have an electric meter nearby
- Under stairwells
Older homes might hide panels behind cabinet doors or in hallways. Multi-unit buildings often have panels in shared spaces like hallways or mechanical rooms.
A quick tip: you can find your panel by following the main electrical service line from your outside meter to its entry point into your home. The panel sits close to this spot.
How to tell if it’s the main panel or a subpanel
The main panel controls your home’s entire electrical supply, while subpanels distribute power to specific areas like garages or additions.
Look for these key differences:
- The main panel has a main breaker that cuts power to the whole house
- The main breaker shows an amperage rating (100, 150, 200) that indicates your house amperage
- The main panel connects neutral and ground wires to the same bus bar
- Subpanels get their power from the main panel and don’t generate power on their own
Houses with higher electrical demands sometimes use secondary panels (subpanels) in workshops, home offices, or areas that use lots of power.
What the panel should look like
A typical electrical panel is easy to spot. You’ll see a gray metal box (about 12-18 inches wide) with a hinged door, mounted at shoulder height on a wall.
Opening the panel door reveals:
- Rows of black switches called circuit breakers
- Labels showing which rooms or appliances each breaker controls
- A main breaker (larger than others) at the top or bottom
- Manufacturer names like Square D, Siemens, GE, or Eaton
The National Electric Code requires electrical panels to have 3 feet of front clearance, 6.5 feet of vertical clearance, and a working space at least 30 inches wide.
How to Check House Amperage Step-by-Step
How to Check House Amperage Step-by-Step
You don’t need expensive equipment or specialized knowledge to check your house amperage. A simple step-by-step process will help you determine this vital information safely.
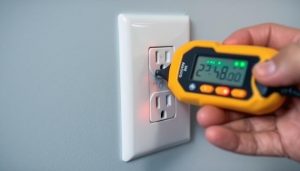
Step 1: Inspect the electric meter
Your electric meter sits outside your home. Take a look at its face or body to find an amperage rating. Some meters have “CL200” marked on them, which suggests they can handle up to 200 amps.
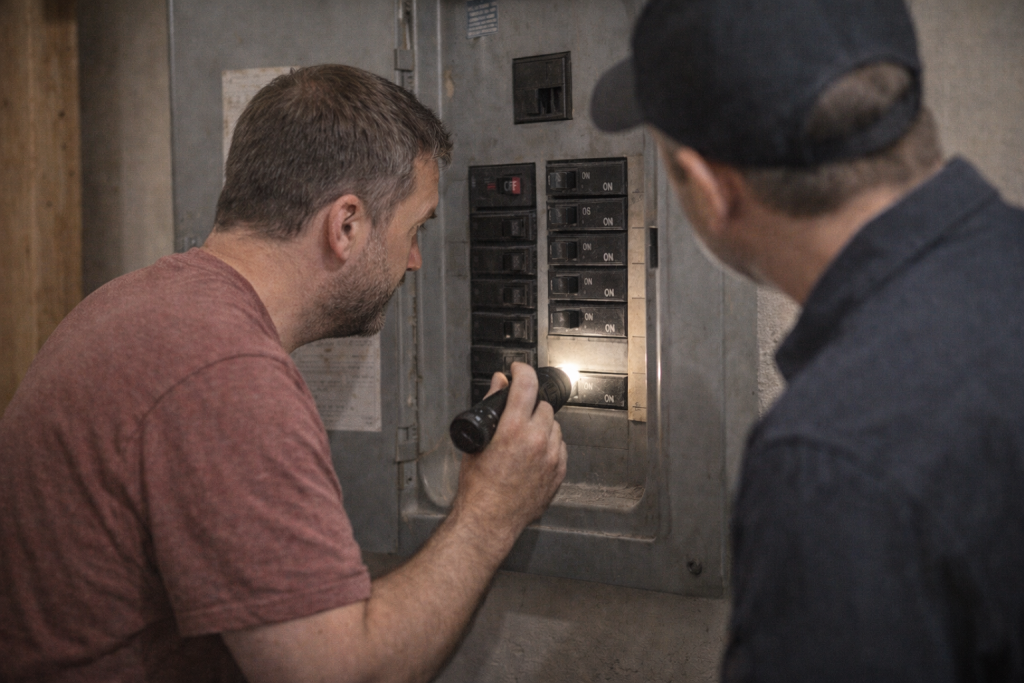
Step 2: Open the panel and find the main breaker
The main breaker sits inside your panel, so open the door with care. You’ll usually find this largest switch at the top or bottom of the panel. Look for labels like “Main” or “Service Disconnect”.
Step 3: Read the amperage rating on the breaker
The main breaker displays a number – 60, 100, 150, or 200 – that shows your panel’s amperage capacity. This number gives you the most reliable reading of your house amperage.
Step 4: Look for manufacturer or inspection labels
The manufacturer’s label inside the panel door might help if the breaker lacks clear markings. These labels typically show the panel’s maximum amperage rating.
Step 5: Compare with wire and conduit size
Your service entrance cable size matters too. Here’s what different sizes mean:
- 1-inch conduit with 6-gage wire points to 60 amps
- 1¼-inch conduit with 4-gage wire means 100 amps
- 2-inch conduit usually handles over 100 amps
Step 6: Confirm the lowest rated component
The smallest rating among your meter, main breaker, panel, and service entrance conductors determines your house amperage. This lowest value represents your actual service size.
What to Do If Your Amperage Is Too Low
What to Do If Your Amperage Is Too Low
Your home’s electrical panel might show that your amperage doesn’t meet your needs. Early detection helps you avoid safety risks and prevents repairs from getting pricey.
Signs your home may need an upgrade
Watch out for these warning signs:
- Circuit breakers that trip often even with normal use
- Lights that dim or flicker as appliances start up
- You can’t run multiple appliances at once
- Electric bills stay high even with normal usage
- Your outlets or panel make buzzing sounds
- Switches or outlets feel warm
Homes built before 1960 usually come with 60-amp service that falls short of modern electrical needs.
Options to increase electrical capacity
Your needs and budget will determine the best solution.
A circuit splitter works well for basic needs. It lets a single circuit power multiple devices and controls power distribution automatically.
The complete upgrade options include:
- A switch to 100-amp service that costs $850-$1,450
- A new 200-amp panel installation at $2,000-$4,000 – now the standard choice
- A subpanel that connects to your main panel
- A smart panel system that gives priority to essential power needs
When to call a licensed electrician
You should reach out to a qualified electrician right away if:
- You smell burning, see sparks, or notice scorched spots
- The panel feels hot
- Major appliances or renovations are in your plans
- Your home insurance asks for electrical updates
- Electrical problems keep coming back
Licensed electricians make sure everything stays safe, meets codes, and matches your home’s specific requirements.
Conclusion
Your home’s electrical capacity is a simple part of being a responsible homeowner. You can now check your house amperage safely and figure out if your electrical service meets your needs.
Most modern homes need at least 200-amp service to handle today’s power requirements. You might need upgrades if you live in an older home with 60 or 100-amp service. This is especially true if you notice frequent circuit breaker trips or dimming lights.
Electricity demands respect and safety comes first. While you can check your panel amperage yourself, leave any electrical upgrades to licensed professionals. A upgrade to 100-amp service costs between $850 and $1,450. A complete 200-amp panel installation ranges from $2,000 to $4,000.
Your home’s electrical system runs everything from lights to major appliances. Adequate amperage prevents power issues and dangerous fire hazards. Check your panel today using the steps above.
Your electrical system works quietly until something goes wrong. Understanding and maintaining proper house amperage will save you money and prevent headaches. Most importantly, it keeps your family safe for years ahead.