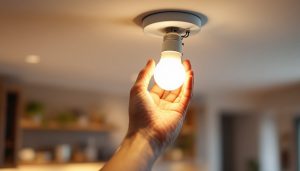
Recessed lighting transforms how a room looks and feels. It eliminates bulky fixtures hanging from the ceiling, creates clean sight lines, and provides even illumination that makes spaces feel larger and more modern. For San Gabriel Valley homeowners updating kitchens, living rooms, or bathrooms, recessed lighting is consistently one of the highest-impact upgrades per dollar spent.
But the cost varies significantly based on whether your home already has ceiling access for wiring, how many lights you want, and what type of LED trim you select. A single recessed light in a new construction project costs a fraction of what a retrofit installation in a finished plaster ceiling requires.
This pricing guide covers what recessed lighting installation actually costs in 2026, broken down by room type, installation method, and the factors that push quotes higher or lower.
Per-Light Installation Costs
The most useful way to understand recessed lighting pricing is per-light, since most rooms require multiple units for proper coverage.
New construction or open ceiling (pre-drywall):
– Cost per light: $75 to $150 installed
– Includes: housing, LED trim, wiring between fixtures, single switch connection
– Why it is cheaper: no ceiling to cut through, no wire fishing, no patching
Retrofit in finished ceiling with attic access above:
– Cost per light: $150 to $250 installed
– Includes: remodel housing, LED trim, wire run from existing circuit, ceiling cut
– Why it is mid-range: access from above makes wire runs straightforward, but ceiling cutting and positioning still takes time
Retrofit in finished ceiling without attic access:
– Cost per light: $250 to $400 installed
– Includes: remodel housing, LED trim, wire fishing through ceiling joists, ceiling cut, potential drywall patching at access points
– Why it is expensive: wire must be fished horizontally through ceiling without visible access, requiring multiple access holes or specialized drilling
Additional wiring costs that apply to all types:
– New dedicated circuit from panel: $200 to $500 (needed when adding significant load to an already-full circuit)
– Dimmer switch installation: $75 to $150 (strongly recommended for recessed lighting)
– Additional switch location (three-way switching): $150 to $300
Room-by-Room Pricing Examples
Here is what typical San Gabriel Valley homeowners pay for complete recessed lighting in common room configurations:
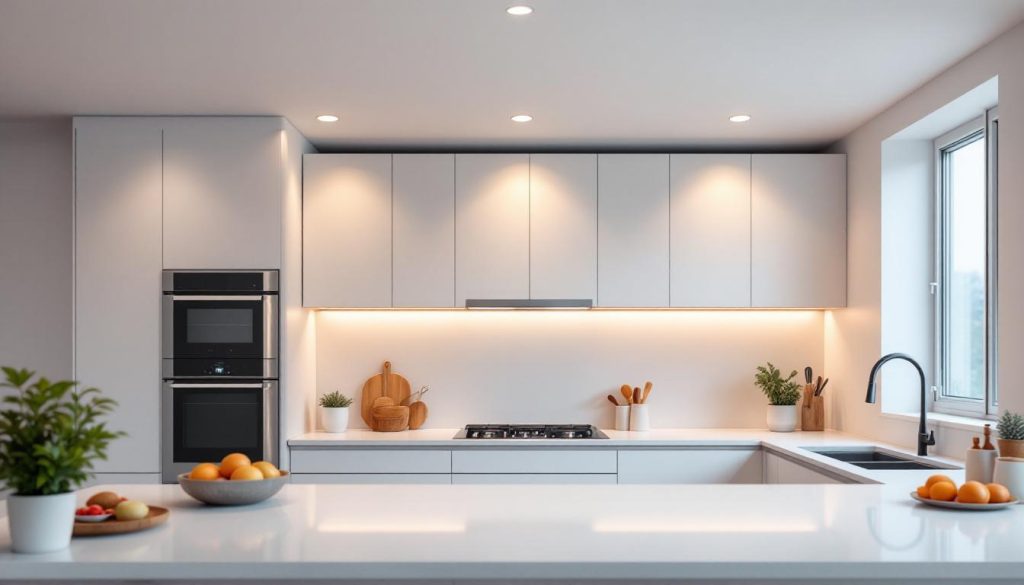
Kitchen (8-10 lights, providing full task and ambient coverage):
– Retrofit with attic access: $1,500 to $2,500
– Retrofit without access: $2,500 to $4,000
– Includes: perimeter lighting, over-island or counter task lighting, dimmer control
Living room (6-8 lights, ambient and accent layout):
– Retrofit with attic access: $1,000 to $2,000
– Retrofit without access: $2,000 to $3,200
– Includes: even ambient spacing, potential wall-wash positioning for art or features
Bedroom (4-6 lights, general illumination):
– Retrofit with attic access: $600 to $1,500
– Retrofit without access: $1,200 to $2,400
– Includes: centered pattern for general lighting, dimmer for mood control
Bathroom (3-4 lights, vanity and shower area):
– Retrofit with attic access: $500 to $1,000
– Retrofit without access: $800 to $1,600
– Includes: IC-rated housings for insulation contact, damp-rated trim for shower locations
These prices include labor, materials (housings, LED trim modules, wire, boxes), and basic switch or dimmer installation. They do not include the cost of drywall repair or painting if access holes are needed.
LED Trim Options and How They Affect Cost
The LED trim module — the visible part you see when looking up at the ceiling — comes in several styles that affect both appearance and price.
Standard baffle trim ($15 to $30 per light): White interior cone that reduces glare. The most common and economical choice. Works well in general living spaces and bedrooms.
Smooth reflector trim ($20 to $40 per light): Mirror-like interior that maximizes light output. Ideal for task areas like kitchens and workspaces where maximum brightness matters.
Adjustable gimbal trim ($30 to $60 per light): Pivots to direct light at an angle. Used for accent lighting — highlighting artwork, architectural features, or specific areas. More expensive but adds design flexibility.
Ultra-thin LED panel ($40 to $80 per light): Newer format that mounts directly to the ceiling with minimal housing depth. Useful when ceiling space is limited (shallow joists, obstructions). Clean modern appearance with very low profile.
Color-tunable LED ($50 to $100 per light): Allows adjustment between warm (2700K) and cool (5000K) color temperatures via switch or smart control. Popular in kitchens where task lighting benefits from cooler tones while dining areas prefer warmer ambiance.
For most San Gabriel Valley homes, standard baffle or smooth reflector trims in 3000K (warm white) provide the best balance of appearance, performance, and cost. If you are lighting a home you plan to enjoy for years, investing in quality LED modules with high CRI (90+) ratings produces noticeably better color rendering and is worth the modest upgrade cost.
Layout Planning: How Many Lights Per Room
Proper spacing determines whether your recessed lighting looks professional or amateurish. Too few lights create dark spots and shadows. Too many create a “runway” appearance and waste money on unnecessary fixtures.
The standard rule: Space recessed lights at a distance equal to half the ceiling height. For an eight-foot ceiling, lights should be approximately four feet apart from each other and two feet from walls.
Kitchen layout specifics:
– Perimeter lights 24 inches from wall edges for counter illumination
– Center lights spaced 4 feet apart for ambient fill
– Direct lights over islands or peninsulas for task visibility
– Total: typically 8-12 lights for an average kitchen
Living room layout specifics:
– Even grid pattern for general ambient lighting
– Or perimeter-focused pattern with wall wash for rooms with artwork or built-ins
– Total: typically 6-8 lights for average living rooms (200-300 sq ft)
Hallway layout:
– Single centered row, spaced 4-5 feet apart
– Total: typically 3-5 lights for a standard hallway
Your electrician should provide a lighting layout plan before installation begins. At Martin’s Electrical, we mark proposed light positions on the ceiling and walk through the room with you to confirm placement before cutting anything. This prevents the costly mistake of lights installed in positions that look wrong once illuminated. Our lighting installation team handles both the electrical and design aspects.
Retrofit vs. Waiting for a Remodel
If you are planning a kitchen or bathroom remodel within the next year or two, timing your recessed lighting installation with that project saves significant money. When drywall is removed during a remodel, installing recessed lighting drops to new-construction pricing because ceiling access is completely open.
When to install now (retrofit):
– You want immediate improvement in a room that functions well otherwise
– No remodel is planned within two to three years
– The room has straightforward attic access above
– You are installing in a location where the existing ceiling will remain intact
When to wait for a remodel:
– A kitchen or bathroom renovation is planned within 12 months
– The existing ceiling will be opened anyway for other work (insulation, plumbing, HVAC)
– You want to reconfigure the entire ceiling layout including moving or adding boxes
– Budget is tight and the savings from open-ceiling installation matter
If you are doing a partial remodel (counters and cabinets but keeping the ceiling), discuss lighting with your electrician before the general contractor closes up any walls or ceilings. Even a brief opening during adjacent work can provide access for wire runs that would otherwise require extensive fishing.
Common Mistakes to Avoid
Homeowners and even some contractors make errors with recessed lighting that are expensive to correct after the fact. Avoiding these from the start saves money and frustration.
Installing too few lights and relying on high brightness to compensate. Three very bright lights in a kitchen create harsh shadows and hot spots. Eight moderately bright lights on a dimmer create even, flattering illumination that can be adjusted for any situation. More fixtures at lower individual output always looks better than fewer fixtures at maximum brightness.
Using the wrong color temperature. A mismatch between 3000K warm lights and 5000K cool lights in adjacent rooms creates a jarring visual transition. Choose one color temperature for connected spaces and use it consistently. For most San Gabriel Valley homes, 3000K throughout living areas and 3500K in kitchens and bathrooms provides the best balance.
Ignoring insulation contact (IC) rating. If your ceiling has insulation resting directly on the backside (common in top-floor rooms with attic insulation above), you must use IC-rated housings. Non-IC housings require insulation to be kept 3 inches away — creating a thermal gap that reduces your home’s energy efficiency. IC-rated units cost only slightly more and eliminate this concern.
Placing lights directly above where people sit. A recessed light directly over a dining table or reading chair creates harsh downlighting on faces. Position lights slightly offset from seating areas and supplement with indirect or adjustable lighting where people spend extended time.
Skipping the dimmer. Recessed lighting without a dimmer operates at only two settings: full blast or off. A quality LED-compatible dimmer adds $75 to $150 to the installation and completely transforms how the room functions — bright for cleaning and task work, dim for relaxing or entertaining.
Getting an Accurate Estimate
Recessed lighting quotes should specify the number of lights, trim type and brand, whether a new circuit is needed, dimmer inclusion, and any drywall patching responsibility. Get quotes that break down material and labor separately so you can compare accurately.
The most common mistake homeowners make is getting a phone quote based on “six recessed lights” without the electrician seeing the actual ceiling structure. Ceiling height, joist direction, presence of HVAC ducts or plumbing above, insulation depth, and access paths all affect installation complexity in ways that cannot be assessed remotely.
Request a free in-home estimate for recessed lighting in your San Gabriel Valley home. We will assess your ceiling access, recommend a layout, and provide exact pricing before you commit to anything.