Between 1965 and 1975, builders across Southern California used aluminum wire instead of copper for residential branch circuits. Copper prices had spiked, and aluminum was a cheaper alternative that met electrical code at the time. Tens of thousands of homes in the San Gabriel Valley — particularly in Glendora, West Covina, Covina, Azusa, and Baldwin Park — were built during this exact decade using aluminum branch circuit wiring.
The problem became apparent within years. Aluminum expands and contracts at a different rate than the copper or brass terminals it connects to. Over repeated heating and cooling cycles (which occur every time current flows), connections loosen. Loose connections create resistance. Resistance creates heat. Heat at an electrical connection point is the precursor to fire.
The Consumer Product Safety Commission found that homes with aluminum wiring are 55 times more likely to have one or more wire connections reach fire-hazard conditions compared to homes wired with copper. That statistic has driven insurance companies to flag aluminum wiring as a material risk factor — affecting coverage availability and premiums for SGV homeowners.
If your home was built between 1965 and 1975, here is how to determine whether you have aluminum wiring and what your options are if you do.
How to Identify Aluminum Wiring in Your Home
You can check several locations without any tools or electrical knowledge. The key is knowing what aluminum wiring looks like compared to copper.
Check your electrical panel interior (with caution):
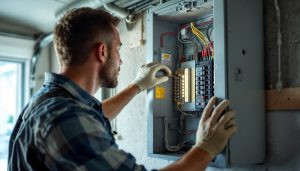
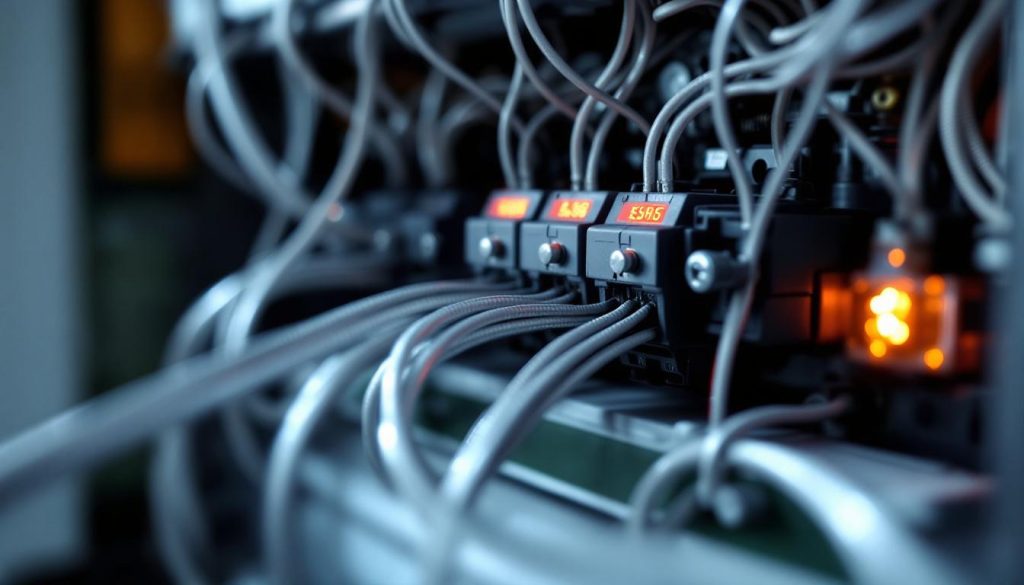
Turn off the main breaker before opening the panel interior cover. Look at the wires connected to your individual circuit breakers. Aluminum wire has a dull silver/grey color. Copper wire has a distinctive orange/brown color. If you see silver-colored wires connecting to branch circuit breakers (not the large service entrance wires, which are commonly aluminum even in copper-wired homes), your home likely has aluminum branch wiring.
Look at wire markings:
Electrical wire has printing along its outer jacket. Look for any of these markings that indicate aluminum:
– “AL” printed on the wire jacket
– “ALUMINUM” printed on the wire jacket
– “AL ACM” or “AL CU” markings
You can find these markings on wires visible in your attic, at the panel, or inside outlet boxes if you remove a cover plate (with the circuit off).
Check outlet connections:
Turn off the circuit breaker for any outlet you want to inspect. Remove the cover plate and carefully pull the outlet forward without disconnecting anything. Look at the wires connected to the outlet terminals. Silver/grey wires indicate aluminum. If you are not comfortable doing this, any electrician can check in minutes during a service call.
Review your home’s build date:
If your SGV home was built between 1965 and 1975, the probability of aluminum wiring is high. Homes built before 1965 or after 1975 almost always have copper. The transition years (1964-1966 and 1974-1976) could go either way — a visual check is the only way to confirm.
Check your home inspection report:
If you purchased your home and received a home inspection report, aluminum wiring is typically noted in the electrical section. Review that document if you have it available.
Why Aluminum Wiring Is a Problem (The Technical Reality)
Aluminum is not inherently unsafe as an electrical conductor. The problem is specifically at connection points — where aluminum wire meets copper or brass terminal screws on outlets, switches, and within junction boxes.
Thermal expansion mismatch. Aluminum expands 36% more than copper when heated. Every time current flows through a connection (creating heat), the aluminum expands more than the terminal it connects to. When current stops and the connection cools, the aluminum contracts back. Over thousands of cycles, this works the connection loose — creating microscopic gaps.
Oxidation creates resistance. When aluminum is exposed to air (at a loosened connection), it forms aluminum oxide on its surface. Unlike copper oxide (which still conducts electricity), aluminum oxide is a poor conductor. This oxide layer adds resistance at the connection, which generates more heat, which loosens the connection further — a progressive cycle that worsens over time.
Creep under sustained load. Aluminum “creeps” (slowly deforms) under mechanical pressure at temperatures lower than copper. The connection that was tight when installed gradually loosens purely from the sustained pressure of the terminal screw — even without thermal cycling.
The failure mode: A connection loosens over years. Oxidation builds. Resistance increases. The connection generates enough heat during normal use to discolor the wire, melt surrounding plastic, and eventually ignite adjacent combustible materials. This process can take years to decades — meaning homes wired with aluminum 50+ years ago are at their highest risk now because connections have had the maximum time to deteriorate.
Insurance Implications for SGV Homeowners
Insurance companies view aluminum wiring as a quantifiable risk factor. Their response varies by carrier but generally falls into these categories:
Carriers that refuse coverage: Some insurers will not write new policies for homes with unmitigated aluminum wiring. If you are purchasing a home with aluminum wiring, confirm insurability before closing.
Carriers that require remediation before coverage: Some carriers will insure the home contingent on remediation being completed within a specified timeframe (typically 30 to 90 days after policy inception).
Carriers that charge higher premiums: Some carriers cover homes with aluminum wiring but apply a surcharge of 20 to 50 percent above standard rates.
Carriers that cover without restriction: Fewer each year, but some carriers do not differentiate based on wiring type. These may have other coverage limitations worth reviewing.
Your insurance agent can tell you exactly how your carrier views aluminum wiring. If you are experiencing coverage difficulties, remediating the wiring often resolves the issue immediately and may reduce your annual premium enough to offset a significant portion of the remediation cost over time.
Remediation Options and Costs
Three established methods address aluminum wiring connections. Each has different cost, permanence, and acceptance by insurance carriers.
COPALUM crimps (gold standard, most expensive):
– What it is: a specialized copper-aluminum connector applied with a calibrated hydraulic tool at every connection point (every outlet, switch, fixture, and junction box)
– How it works: creates a permanent, cold-welded connection between the aluminum wire and a short copper pigtail that then connects to the device terminal
– Cost: $60 to $100 per connection point. Typical home: $3,000 to $6,000 for all connections
– Permanence: considered a permanent repair — no maintenance or re-inspection needed
– Insurance acceptance: universally accepted by all carriers
AlumiConn connectors (most common, cost-effective):
– What it is: a set-screw lug connector that joins aluminum wire to a copper pigtail at each connection
– How it works: the aluminum wire inserts into one side and a copper pigtail inserts into the other, with set screws providing mechanical connection and anti-oxidant compound preventing corrosion
– Cost: $40 to $75 per connection point. Typical home: $2,000 to $4,500 for all connections
– Permanence: long-lasting when properly installed (20+ year expected life)
– Insurance acceptance: accepted by most carriers (verify with yours specifically)
Complete rewire (most comprehensive, highest cost):
– What it is: removal of all aluminum branch wiring and replacement with copper
– How it works: new copper Romex is pulled through the home, replacing aluminum throughout. Includes new outlets, switches, and panel upgrade
– Cost: $12,000 to $25,000 depending on home size and access
– Permanence: eliminates aluminum wiring permanently
– Insurance acceptance: fully resolves all concerns
For most San Gabriel Valley homeowners, AlumiConn remediation provides the best balance of safety, cost, and insurance compliance. COPALUM is superior technically but the specialized tool requirement limits availability and increases cost. Full rewiring is warranted when the home also has other electrical deficiencies (undersized panel, insufficient circuits, degraded insulation) that justify the comprehensive scope.
What Happens During Remediation
Regardless of method chosen, the process involves accessing every connection point where aluminum wire terminates:
– Every outlet in the home (both terminal connections)
– Every light switch
– Every light fixture connection
– Every junction box (in attic, walls, crawlspace)
– Panel connections (if aluminum feeds individual breakers)
For a typical 3-bedroom SGV home, this means approximately 40 to 80 individual connection points. The electrical repair takes one to three days depending on home size and accessibility.
The electrician removes each device cover, disconnects the aluminum wire from the device terminals, installs the appropriate connector (COPALUM or AlumiConn) with anti-oxidant compound, attaches a copper pigtail, and reconnects the copper pigtail to the device. Each connection is tested for proper tightness and conductivity.
After all connections are remediated, the electrician provides a written certification documenting the work performed — this document satisfies insurance requirements and serves as disclosure documentation for future real estate transactions.
Living Safely With Aluminum Wiring Before Remediation
If you have confirmed aluminum wiring but cannot remediate immediately, these precautions reduce risk while you plan the work:
– Do not overload any circuit. Keep total draw below 80% of the circuit rating (12 amps on a 15-amp circuit). Avoid space heaters, multiple high-draw appliances, and anything that generates sustained heavy load.
– Check outlets periodically for warmth. Press the back of your hand against outlet covers monthly. Any warmth indicates a deteriorating connection that needs immediate attention.
– Never use extension cords as permanent solutions. Extension cords add connection points — each one is a potential heat source with aluminum wiring.
– Replace any outlet or switch that feels loose when devices are plugged in or switches toggled. Loose devices indicate loose internal connections.
– Install AFCI breakers on bedroom circuits if your panel supports them. AFCI breakers detect the arcing that occurs at deteriorating aluminum connections and trip before fire ignition.
– Ensure working smoke detectors in every bedroom and hallway. This is critical life safety while aluminum wiring remains active.
These measures do not eliminate the risk — they manage it. Remediation remains the permanent solution, and the sooner it happens, the sooner the risk returns to baseline.
Take the First Step
If your home was built between 1965 and 1975, spend five minutes checking the visual indicators described above. If you see silver-colored wires at your panel or inside outlet boxes, schedule a professional assessment.
The assessment confirms whether aluminum is present, documents how many connection points exist, and provides an exact remediation quote. Most assessments take under an hour and give you a complete picture of your exposure and options.
Request a free estimate for aluminum wiring assessment and remediation in your San Gabriel Valley home. We have remediated hundreds of aluminum-wired homes across the SGV and can provide a clear timeline and exact pricing for your specific situation.